Easy Fall Craft for a Texas Cabin Weekend: DIY Dollar Tree Silver Platter Pumpkin

If you’re planning a Texas cabin weekend, fall family getaway, girls’ trip, or cozy seasonal gathering, this DIY Dollar Tree Silver Platter Pumpkin is an easy craft that adds a little autumn charm without costing much. It uses simple supplies and makes a cute fall decoration for a porch, cabin table, vacation rental, or home entryway.
This is the kind of project you can make before your trip or pack as a relaxed craft activity during a weekend getaway. Because apparently even pumpkins need to be budget-friendly and emotionally supportive now.
DIY Dollar Tree Silver Platter Pumpkin
Supplies You’ll Need
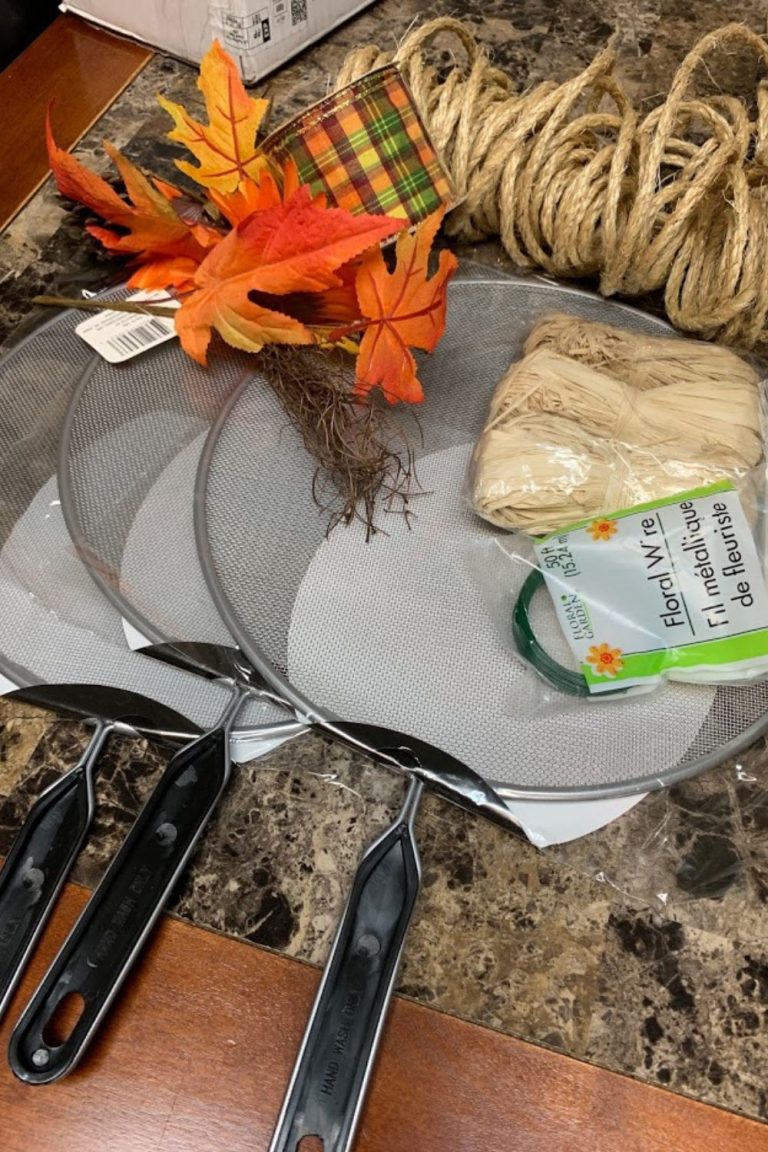
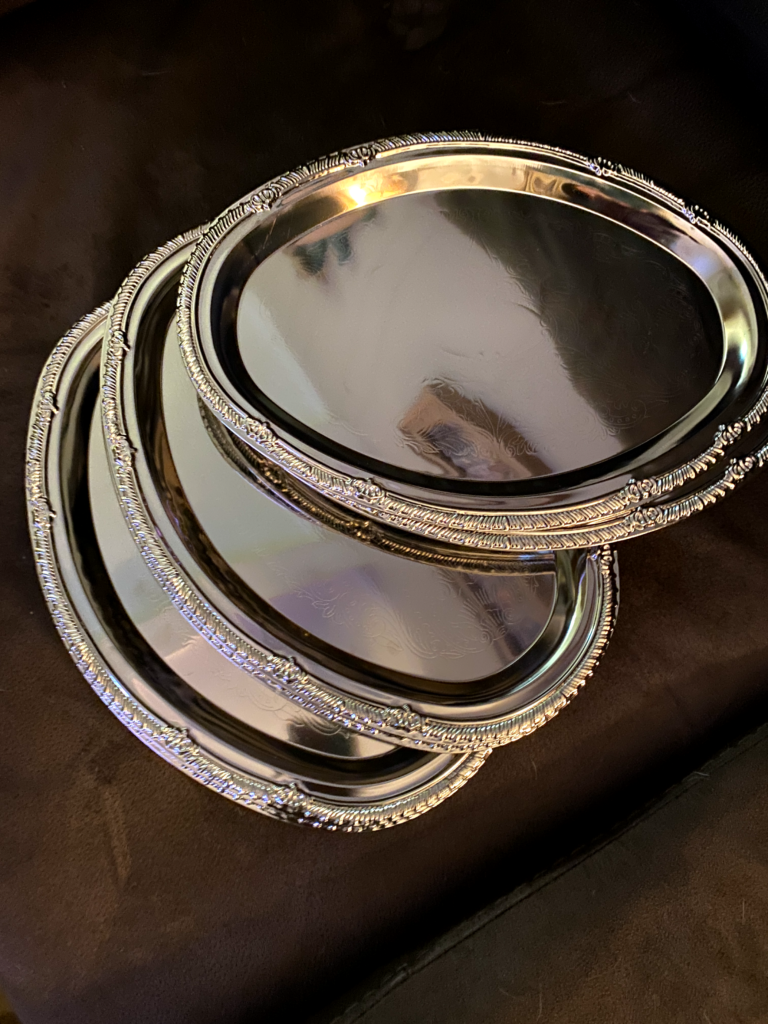
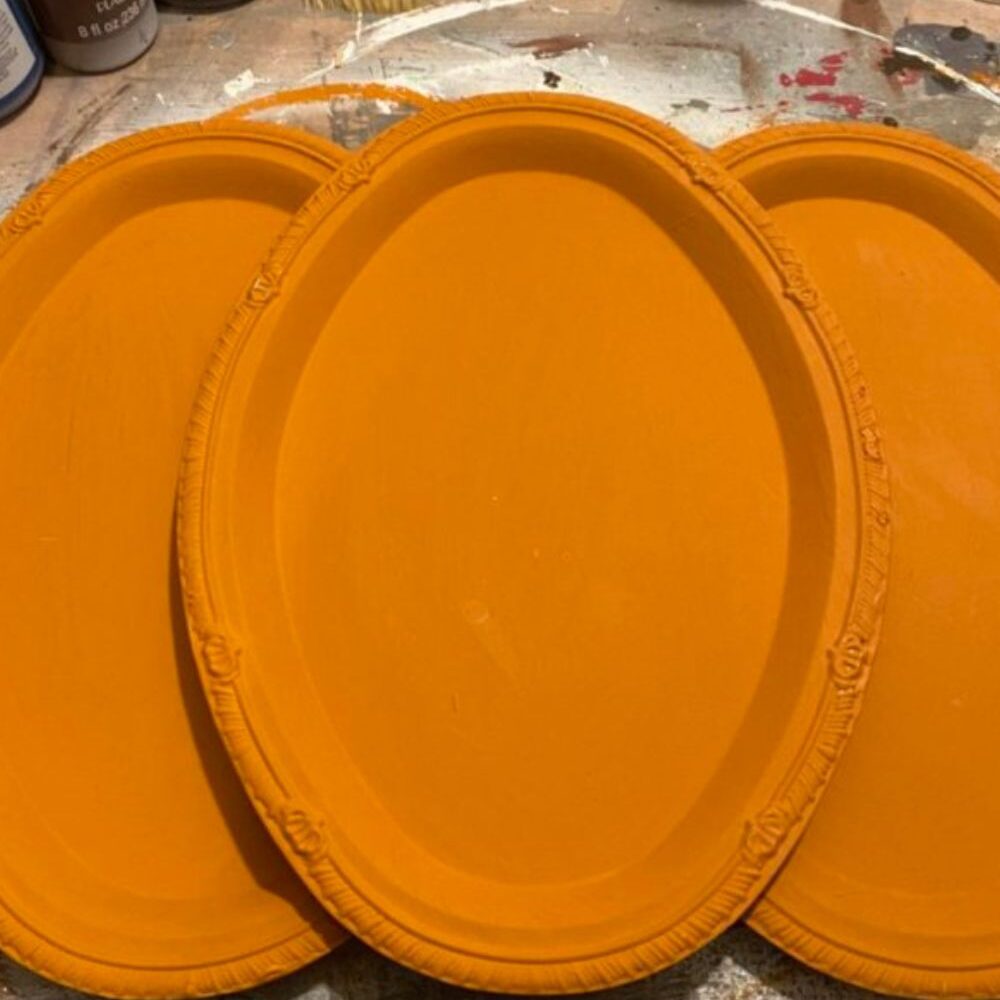
- Oval silver platters
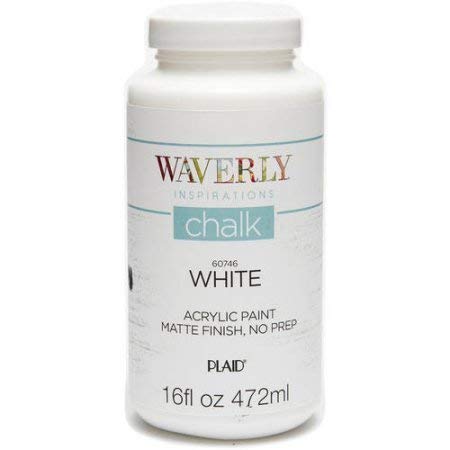
- Chalk paint
- Acrylic paint
- Antique wax or stain
- Wine cork
- Fall ribbon
- Hot glue gun
- Glue sticks
- Small wood pieces or paint sticks
- Paint brushes
- Paper towels
- Disposable table covering

Please note: You can even get some paints at Dollar Tree, at least I know you can some acrylics. I already had these paints on hand.
Also, I do have printable instructions at the bottom of this post.
Tips for Making This Craft During a Fall Getaway
If you want to make this during a Texas cabin weekend or vacation rental stay, pack the supplies together before you leave. Place small items like ribbon, corks, glue sticks, and paint brushes in a zip-top bag or storage container.
Bring a disposable table covering so you can protect the table or counter where you are crafting. Paint and hot glue do not care about your security deposit, because apparently craft supplies are tiny criminals.
Instructions
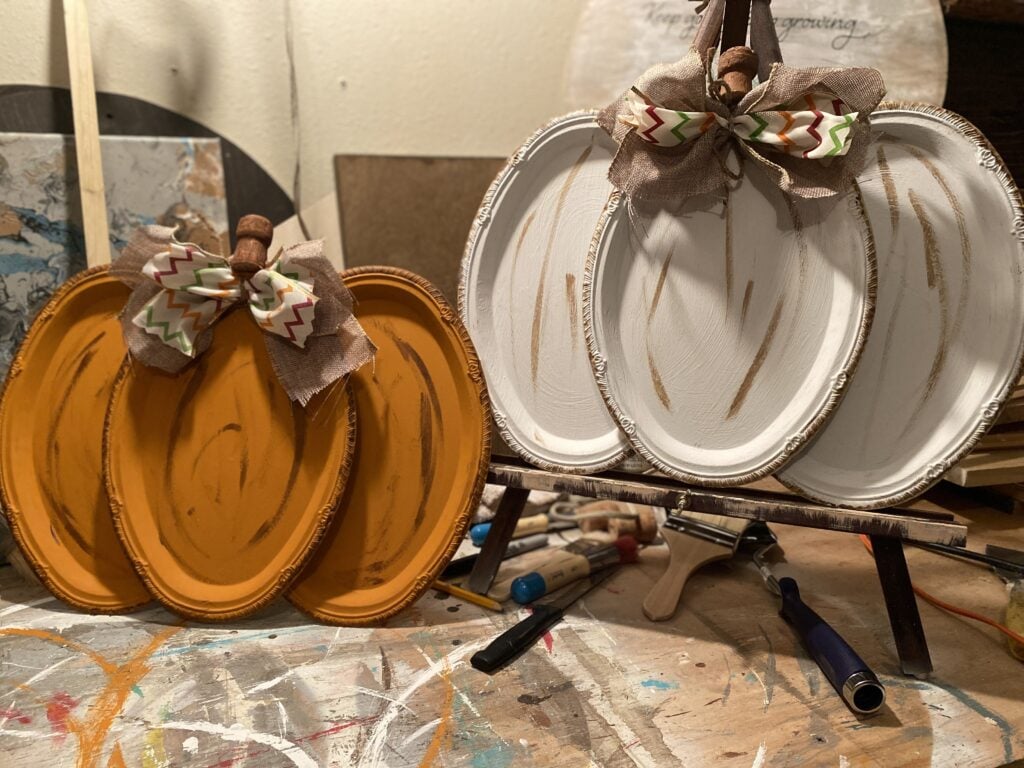
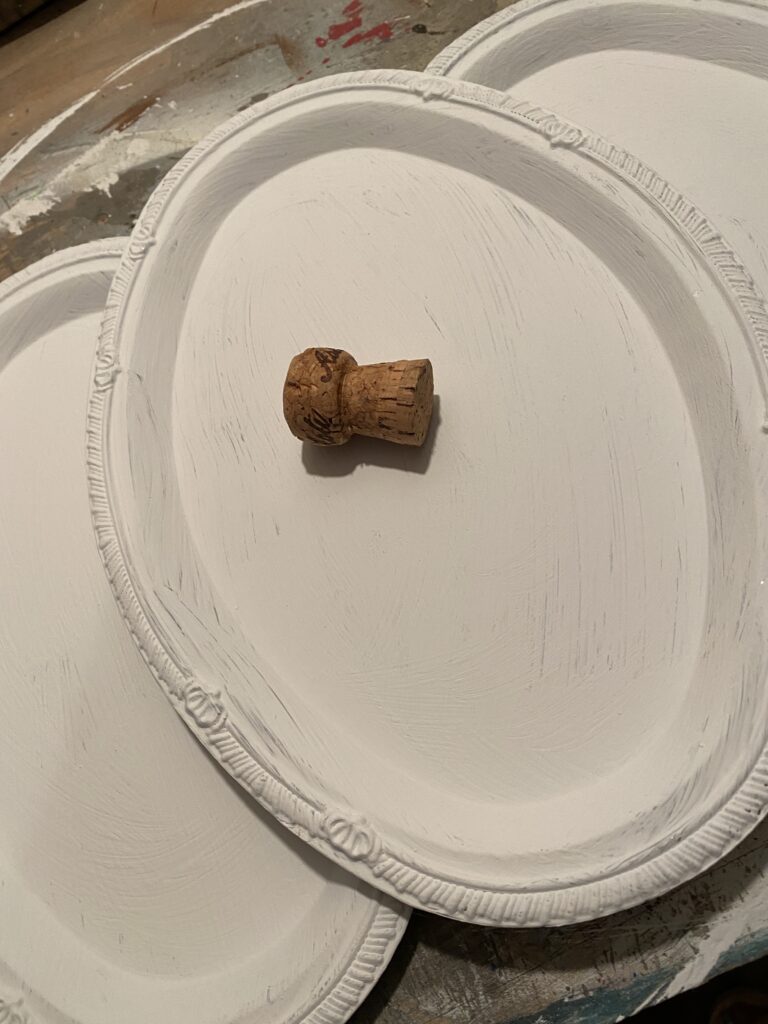
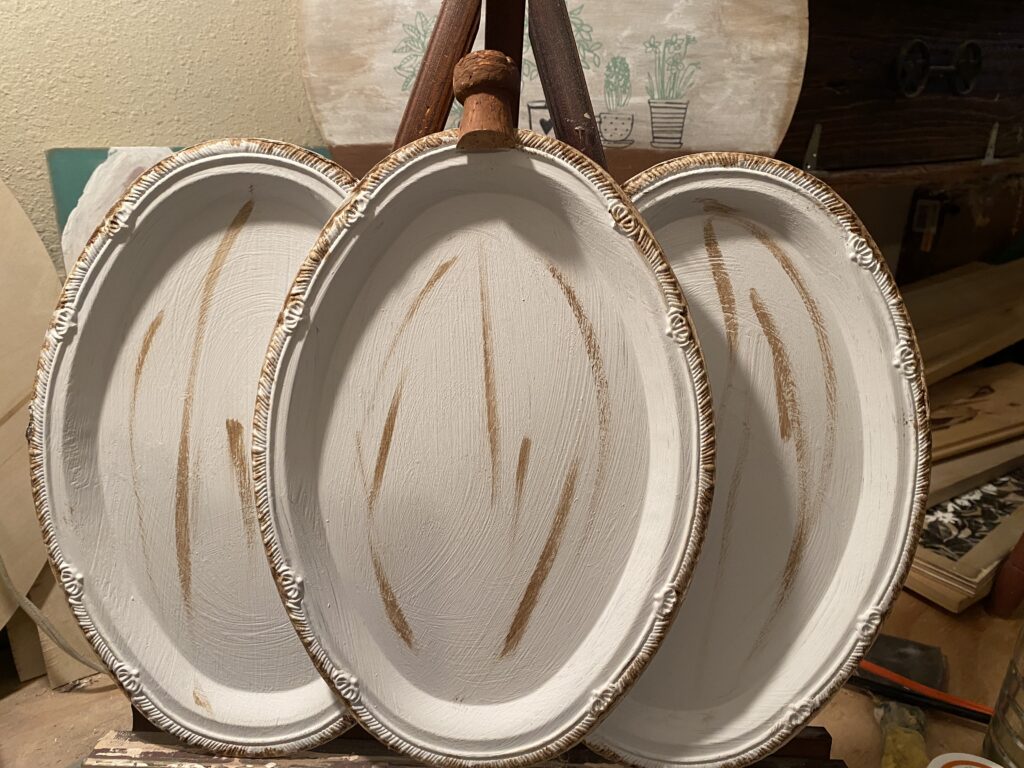
- Paint each one of your silver platters with chalk paint and let dry.
- Lay two of the platters side by side.
- Where the platters are touching, apply hot glue in that area.
- Lay the other pumpkin on top where you applied the hot glue and let set to dry.
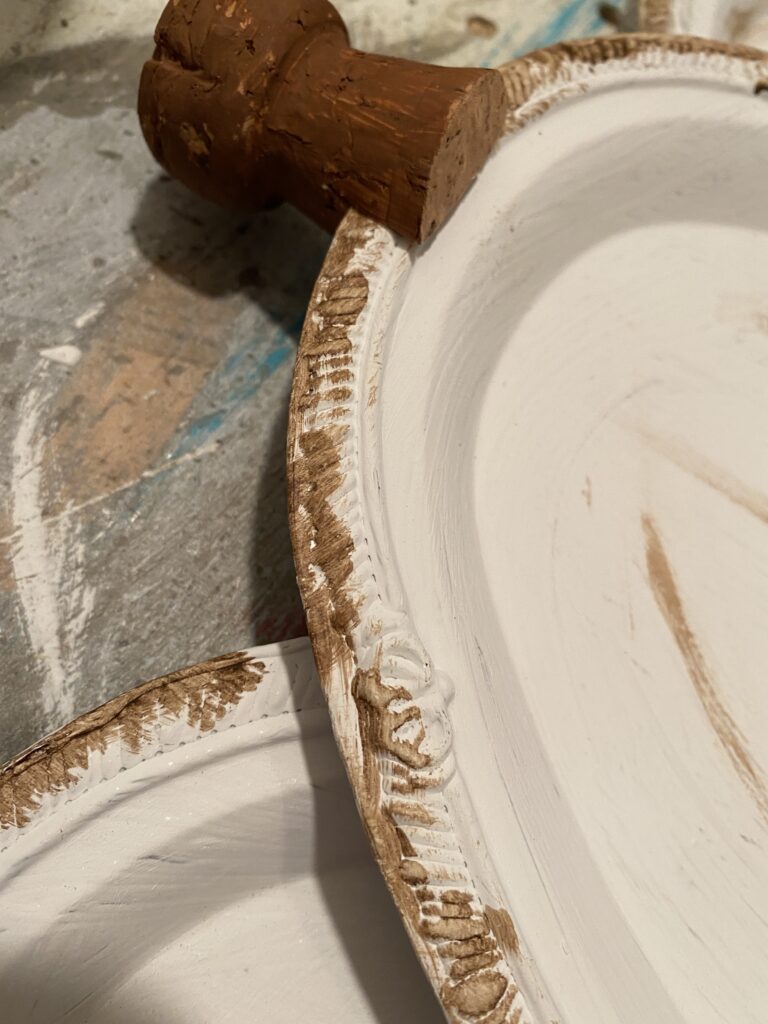
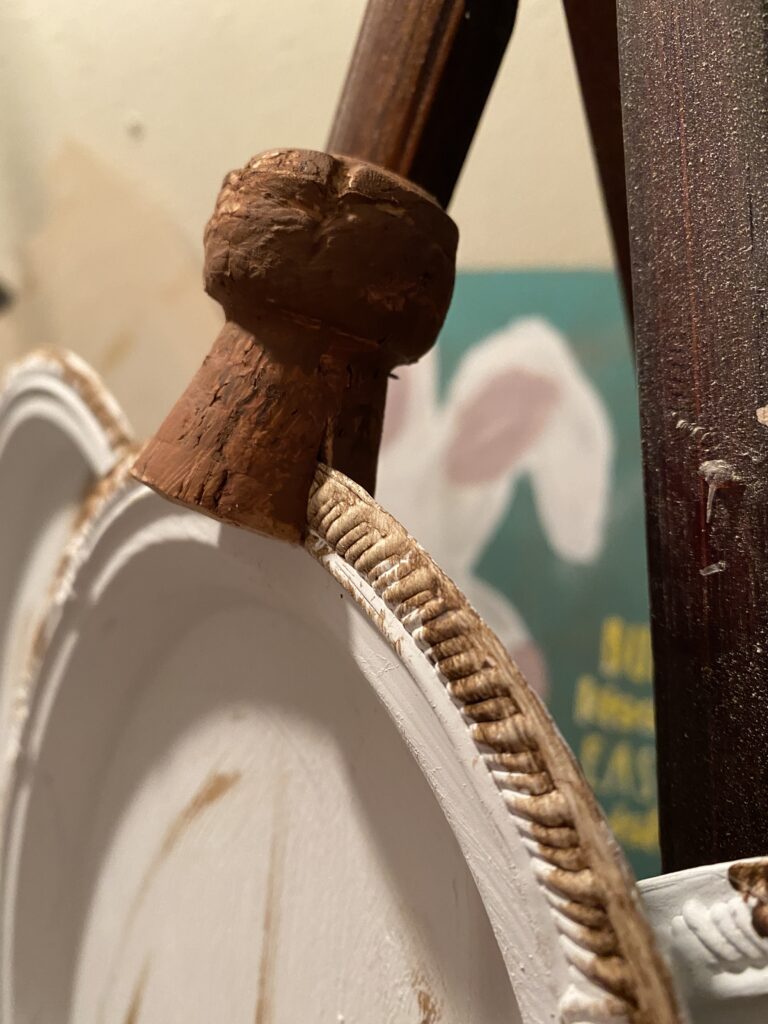
- Using your antique wax or stain, make marks on your platters by using a small brush or paper towel.
- Cut a slit in your wine cork and attach it to the top of center platter, you can had a little hot glue if you like.
- Take your ribbon and make a bow and hot glue it just below the stem.
- Take your paint sticks or thin wood and hot glue to the back of the pumpkin for support and paint over them if you choose.
Safety Tip
Adults should handle the hot glue gun and any cutting, especially if kids are helping with this project. Let the paint and glue dry fully before hanging, displaying, or packing the pumpkin to take home.
Please share if you love this diy


DIY Dollar Tree Silver Platter Pumpkin
Materials
- 1. Oval Silver Platters - 3 of them.
- 2. Chalk Paint
- 3. Acrylic Paint for stem
- 4. Antique wax for markings (or you can use stain)
- 5. Wine Cork
- 6. Fall ribbon
- 7. Hot glue
- 8 Small paint sticks or thin wood, just a few inches long - 2 of them
Tools
- 1. Hot Glue Gun
- 2. Knife to cut cork
Instructions
- Paint each one of your silver platters with chalk paint and let dry.
- Lay two of the platters side by side.
- Where the platters are touching, apply hot glue in that area.
- Lay the other pumpkin on top where you applied the hot glue and let set to dry.
- Using your antique wax or stain, make marks on your platters by using a small brush or paper towel.
- Cut a slit in your wine cork and attach it to the top of center platter, you can had a little hot glue if you like.
- Take your ribbon and make a bow and hot glue it just below the stem.
- Take your paint sticks or thin wood and hot glue to the back of the pumpkin for support and paint over them if you choose.
Recommended Products
As an Amazon Associate and member of other affiliate programs, I earn from qualifying purchases.